
Better mobile experience with
SMS and MMS.
The complete mobile messaging platform, delivered with clever functionality, rich interactivity and unprecedented insights. All designed to ensure the things you say reach and engage the people who matter most.
Boost active customer conversions
with an ROI of 18-22x
Use Australia and New Zealand’s fastest growing SMS/MMS provider
Re-engage old customers with
an ROI of 12-15x
Some services tell tall tales about the number of SMS messages they send and how effective their service is. But Tall Bob isn’t satisfied with simply sending messages, which is why our robust platform delivers more functionality, more creativity and more insight with every message. Plus, we offer superior strategic advice on strategy and execution so you get the business outcomes you need.
When it comes to delivery you can count on Tall Bob, your trusted partner.

Give your message maximum clarity with extra engagement tools and analytical insights
With our insights and added functionality at your disposal, your messages are designed for success from day one.
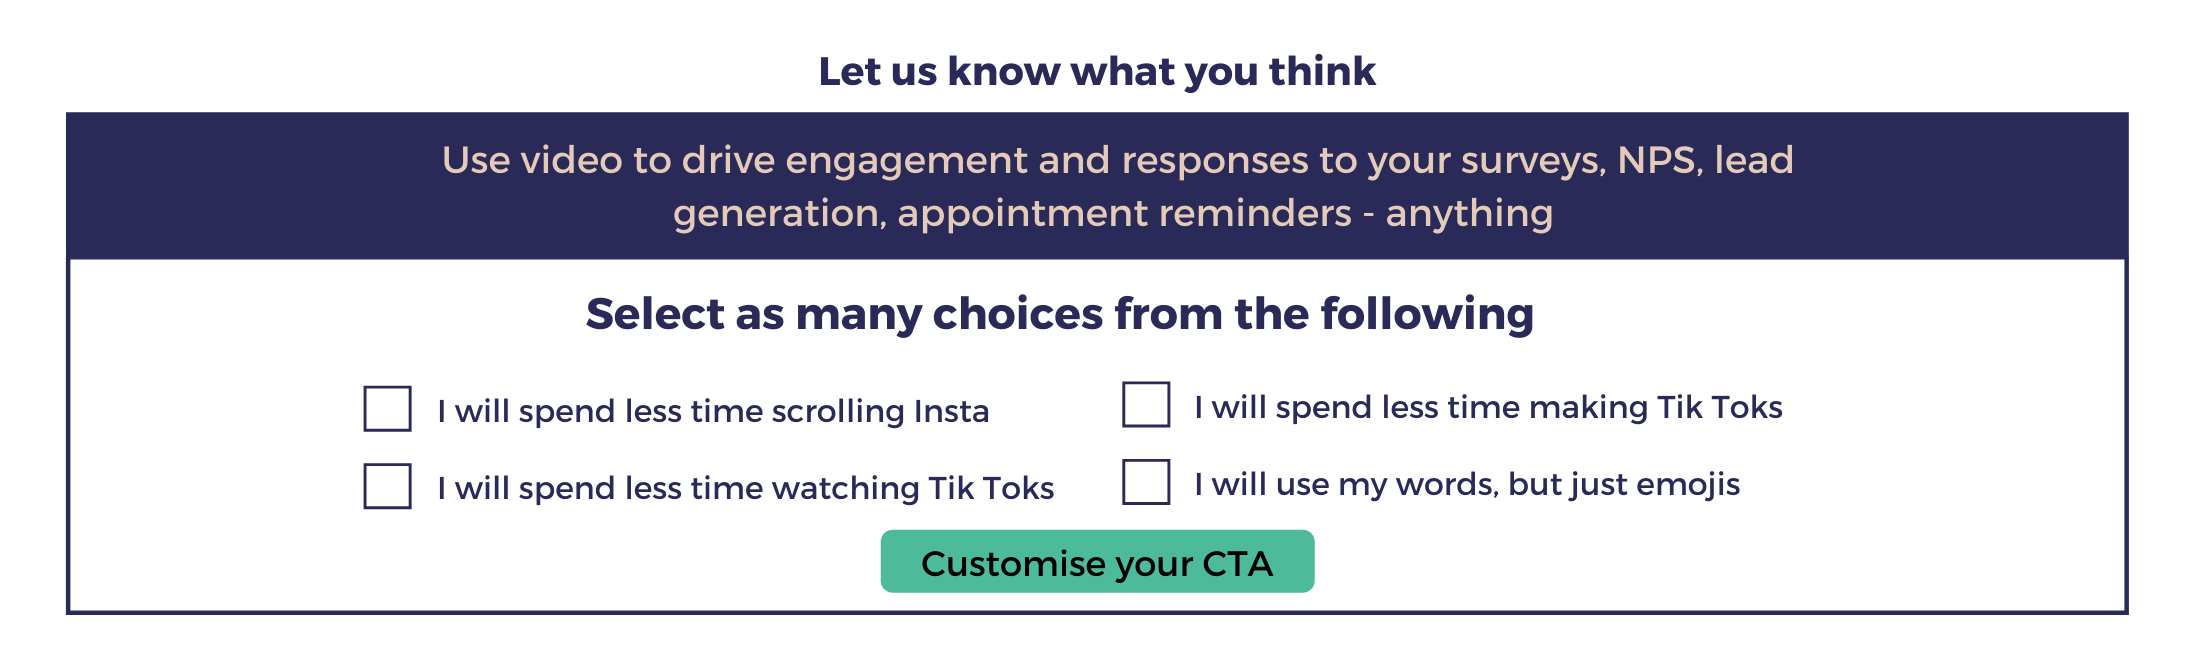
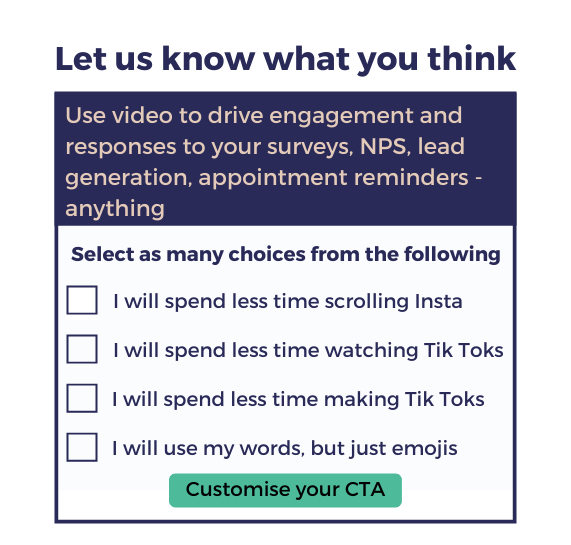
Cut through the clutter of traditional SMS and MMS by incorporating engaging video content, surveys, gamification tools, augmented reality and catalogues to your SMS journeys to maximise your customer experience and conversions.
Use valuable data, reports and insights, to optimise your campaigns to do more of what’s working and less of what’s not.
View in real time how your campaigns are preforming as well as analyse the entire journey behaviour of every single recipient.
All data can be further segmented, exported and fed into third-party platforms.
From the unwavering reliability of our system to our consistently prompt local support team, we’re always here to make certain the message gets through.
Our dedicated account managers and technical team are on hand to ensure you deliver on superior strategy, implementation, customisation and integration.
Tall Bob delivers your messages to the people that matter, at the moments that count
With SMS’s 97% open rate, strong and credible messages have the power to capture attention, start conversations and prompt an action. And, with the right suite of products—like our media-rich landing pages—you also have the power to guide recipients through their customer journey faster, transforming them into loyal customers.
- Reach customers anywhere within minutes
- Use powerful engagement tools
- Leverage valuable, convertible insights
- Make better decisions on target markets
- Improve ROI
Important messages need to be delivered quickly and reliably. Keep your workplace connected with a dependable internal communications network where—no matter the size or spread of your team—you can get important information into the right hands easily and effectively, plus leverage our data and insights as an audit trail.
- Distribute videos and surveys
- Manage team rosters
- Share safety notices and alerts
- Communicate effectively with your frontline staff
Boost your customers’ experience and create internal business efficiencies by utilising the powerful combination of SMS, engagement tools and analytics. By integrating mobile communication into your service delivery, Tall Bob can ensure your clientele remain informed and engaged, while you benefit from the reduced costs.
- Reduce inbound queries
- Increase cost efficiencies
- Drive customer satisfaction
- Have 2-way automated interactions
- Leverage our form builder and landing page functionality
Make your message impossible to ignore with unbelievable customisation


Why Tall Bob?
Guaranteed outcomes
Our advanced platform is a product of countless years refining message delivery and engagement. Rest assured, our capabilities will shape campaigns that meet your business objectives, boost engagement and improve ROI.
Simple integration
Don’t waste time juggling different platforms. Effortlessly integrate Tall Bob’s SMS gateway and MMS gateway with any of your existing systems. Our simple SMS APIs and webhooks are powerful and will streamline your mobile communication.
Unrivalled reliability
You can depend on our system to deliver messages, just like you can rely on our local team for prompt support, strategic and implementation advice. We’re always here to ensure effective messages get through, rain, hail or shine.
“A key attraction for me when using Tall Bob was that I could see from the analytics whether my shareholders were engaged. I see what content they find compelling and how best to communicate.”
Energy and utilities
“The integrated solution gives us a reliable, direct and personal communication platform allowing us to engage our prospects as well as decrease the time between listing to lease or sales journey!”
Real estate
“Tall Bob enables direct, visual comms with staff and volunteers during the Australian Open. Sharing updates, attendance and sponsorship activations through video helps us through the event.”
Sports and entertainment
“Wonderful technical support and service! Their passionate team go above and beyond to ensure we achieve our communication goals. It is nice to know that help is just a phone call away!”
National retailer
“Tall Bob’s solutions are effective in communicating with our remote staff across Australia and New Zealand. They allowed us to implement our video strategy in a secure and timely manner.”
Food and beverage manufacturer
Tall Bob has enabled us to execute video campaigns within minutes saving us and the IT department a significant amount of time. We now have the bandwidth to develop and execute a video strategy.”